Pages

Thursday, February 28, 2013

Photo Flower


Sorry it's been so long since my last post. Gotta love midterms, right? Well in the mix of all my studying and paper-writing, I decided to take a crafting break. This one is so easy to do, and it's such a cute way to bring an early spring to your room. Plus, it helps clean out your crafting bin from all those left over pieces.


What you'll need:
-Sturdy wire (mine is beading wire)
-Wire cutters
-Yarn (as many colors as you want to use- I used 2)
-tape
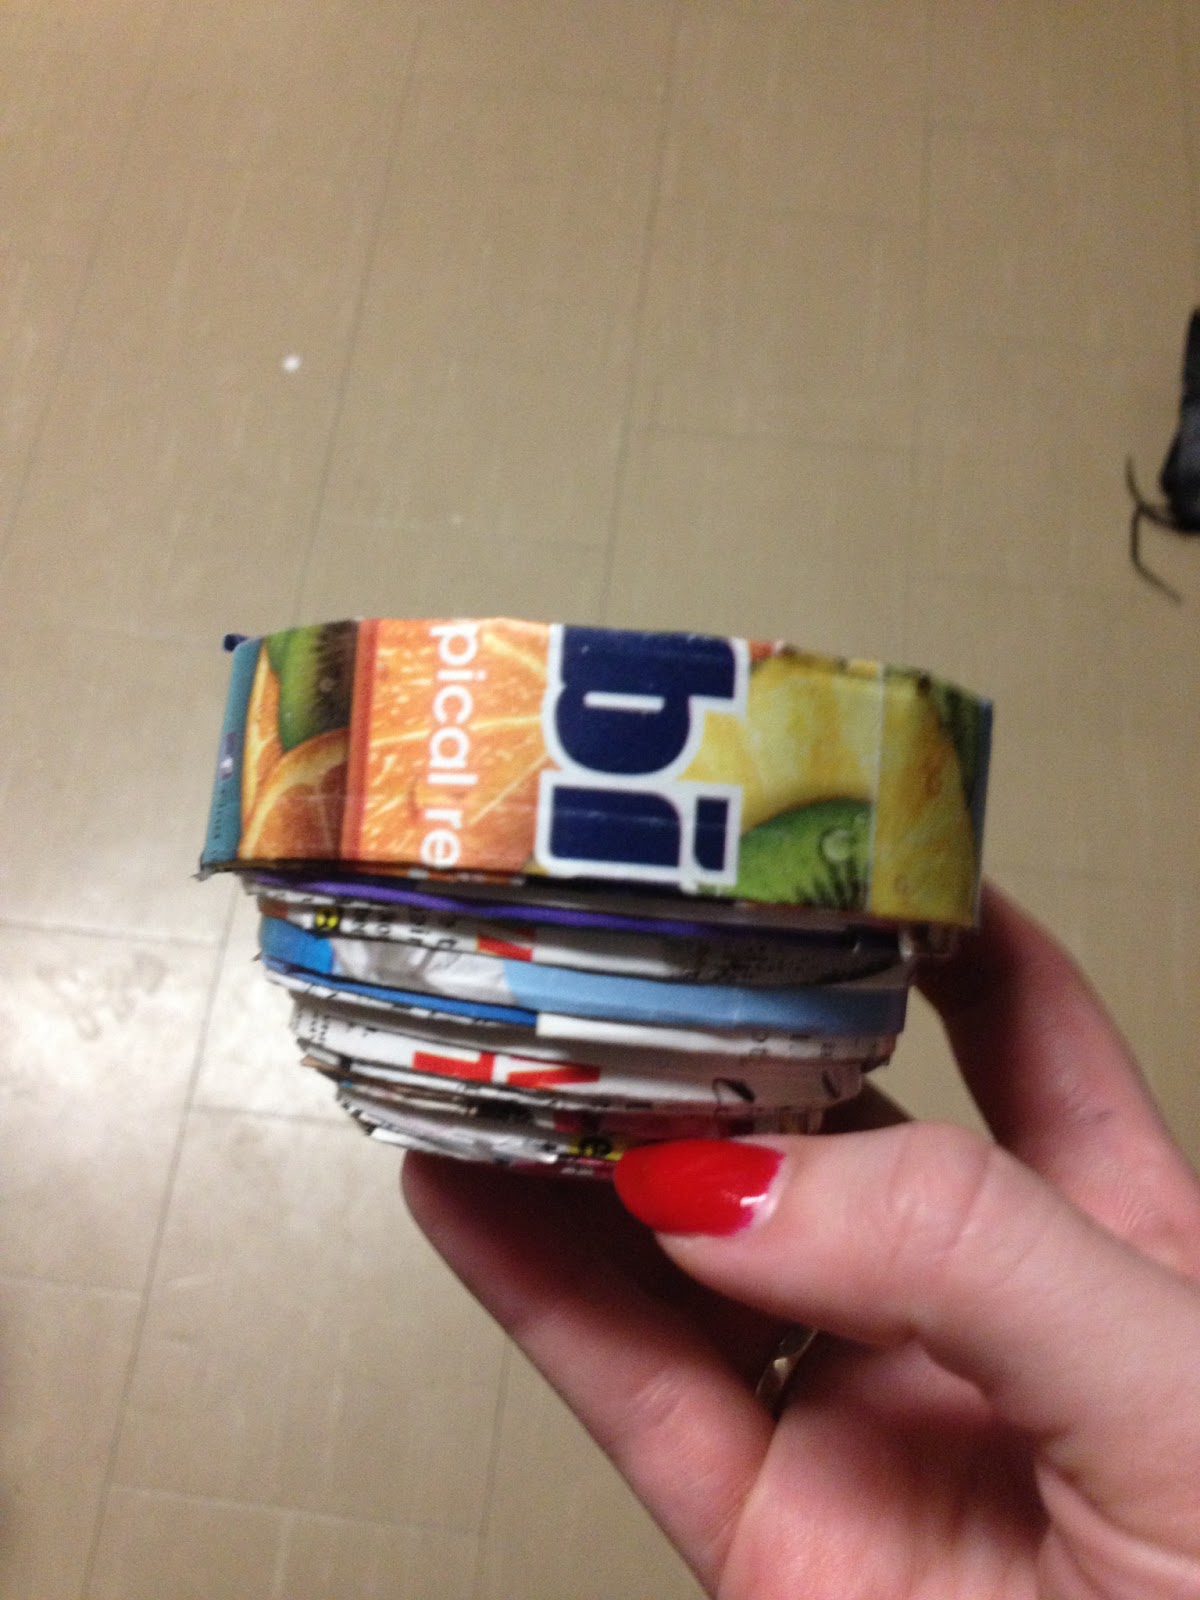
-Magazine pot (See? I said that this post would show up again)
-Clay or poster putty
-glass rocks to fill the pot (left over from this craft)

 
The first part of this craft is to shape your flower out of wire. Make one petal at a time, wrapping the wire around the center post so each is secure. This also creates the center for your flower (think daises). Then make stem, folding the wire so it goes up and down the length 3 times for added stability.

Now decide what pattern you want to create with your yarn. I only had access to pink and purple, but it definitely matches my dorm this way. Pick a peddle to start on (it doesn't really matter which one) and tie the yard firmly to the wire. Next tape the short tail from the knot to one of the unwrapped petals. This is temporary, but it needs to be held down while you start wrapping. Wrap the yarn tightly around the wire, continuing around the petal as you go.


If you want to make more than one petal the same color, don't worry about using a separate piece of yarn for each one. It is actually easier to pass behind the center of your flower (by doing this you are essentially picking the front and the back of the piece) and continue wrapping on the other petals. Once you are done with that color, tie the end that you are holding to the end that you taped down in the beginning. If the knot is tight enough, this will keep the whole thing from unraveling. Follow the same steps for as many colors as you want to do, tying it all together in the back when you are done.


To finish it off, grab one of the cute bowls/pots you made from magazines in the earlier post (or find a different vessel) and put a glob of clay at the bottom. I actually used that poster putty that you use so you don't damage dorm walls, and that works just as well. Stick the stem of your flower into the clay and mold it around the wire so it stands up straight. Finally add the glass rocks to the pot to fill it (apparently I didn't bring as many as  I thought, so I'll have to finish filling mine over spring break).


All that's left now is to find your favorite photos and stick them between the petals of the flower. Cute, right?! Unlike a normal "frame" this is both whimsy and easy to change out. You could add a different photo every day if you really wanted to. Enjoy your new decor, and, as usual, happy crafting.

Thursday, February 14, 2013

Non-accidental Bleaching


For those of us in the northeast, this last weekend was quite the blizzard, which meant a lot of time stuck inside. My friends and I kept busy, however. What better a way to pass the time than crafting? This week's adventure was bleaching a t-shirt. Everyone at some point or another has opened the washing machine and realized that they accidentally got bleach on their favorite outfit (Bummer!). We decided to try our hand at "ruining" a shirt on purpose instead, and it came out pretty great!


What you'll need:
- A t-shirt
- cardstock
- scissors 
- cardboard
- a spray bottle
- liquid bleach
- a place to rinse the shirt out

The first step: pick your victim. I got my shirt at Goodwill, but Michael's has a great selection too. Or, better yet, raid your closet for a t-shirt you never wear and turn it into a handmade outfit. One note about picking your t-shirt: consider colors. The darker the shirt, the better, and remember that black when bleached turns a weird rust-yellow color. This could look really cool, but if you're expecting grey, you'll be disappointed.


Next, pick your design. Keep in mind that you are going to use the outline of whatever design you choose as a stencil for your shirt. You could draw something yourself, or do what I did and find something off the internet. Can you guess what I chose? Yep, yet another Harry Potter reference: the deathly hallows symbol. (I also referenced my addiction to HP in my first blog post) I liked this one because it was easy to cut out and represented my inner geek. Draw/print your design on cardstock and cut it out.

Next, mix the bleach solution. I used 1 part bleach to 3 parts water. I know it sounds really watered down, but it works just fine. Pour it into a spray bottle and you're ready to go.


Put a piece of cardboard in between your shirt (where your body would go). This keeps the bleach from seeping through to the back. I forgot to cover the neck hole of my shirt, so it is slightly bleached on the inside too, but luckily it didn't get through to the back. I also spread some wax paper down (newspaper would work too) so that the spray didn't accidentally get on the table. Lay your stencil where you want it on the shirt and press it down firmly. I know it seems like you need something to stick it to the shirt, but you really don't. It works like a charm as is.

The next step is to spray the shirt. Make sure you are standing almost directly over it. This way none of it seeps under the stencil. Because we did ours on the table, we had to stand on a chair to spray it. Be sure to spray evenly, making sure the entire area you want to bleach is damp, but not soaked.


Now you have to stand there and watch it. You'll be able to see it start to change colors. (I removed the stencil so I could watch the contrast more closely.) It is kind of like playing chicken with yourself, because as soon as you like the way it looks you have to run the shirt to the sink and rinse it out. The longer you leave it, the greater the contrast. In retrospect, I probably would have left mine a little while longer, but I still like the way it turns out. If you chicken out too early, you can always dry the shirt and do it again. Just lay the stencil in the same spot and repeat the steps.


Once you've rinsed it out, hang it up to dry completely. I would recommend washing it separately from the rest of your clothes the first time, just in case there is any bleach residue hanging out in your awesome new outfit.


There you have it! People are definitely impressed that we did this ourselves, and it makes your average t-shirt so much more exciting for very little money. The possibilities are endless, so enjoy creating your own wardrobe. Happy crafting!! 

Thursday, February 7, 2013

Magazine upcycle


I have always had magazine subscriptions, and I typically end up saving each magazine because "they might be useful someday." Aka, they are the classic sign of a craft project in waiting. This has been the biggest deal all over the crafting websites, and I thought I'd give it a go.

What you'll need:
- An old magazine
- scotch tape
- scissors
- Protractor/ruler (optional: it just helps you get a cleaner fold)
- Mod Podge (yes, our old friend is back again!!)
- a paintbrush 


The first step is to cut the pages. Cut them as close to the seam as possible, and then cut in half longways. You'll end up with a pile of strips.


The most time consuming part is next: (1) Take the strip and put the most colorful side facing out from where you plan to fold. (2) Fold the strips in half and crease firmly. (3) Fold in half one more time, cleaning up the edges as much as you can as you go.

***HINTS: using the flat side of a protractor or a ruler really helps crease the paper and saves you from potential paper cuts. It also allows you to fold more than one strip at a time during step 2, which is a significant time saver*** 


This next part is my equivent to knitting (because I definitely cannot knit). Its easy and definitely something you can do while studying or watching TV.  Take your first strip and coil it onto itself. You want the coil to be as tight as possible without ripping the paper. When that strip runs out, put a clear piece of tape and overlap the next strip. Some designs say that pinching the corners as you go can create a square shaped bowl, and if you want to give that a try, start pinching from the beginning.


When rolling the coil, you have to decide how large you want your bowl to be, remembering that you need a decent sided base to support it. To test it at any given moment, just tape down the end of the last strip and slowly push the coil into a cone. BEWARE: if you push too far or too quickly, it will all uncoil and you'll end up with a long strip to start over with. I tested mine a lot in the process, partially because I'm impatient. When you like it, go ahead and leave it pushed out.


Here is the biggest argument my friends and I have had about these bowls. My next step is to tell you to cover the entire thing in Mod Podge so it is sturdy and wont come apart. My friends however like the idea of a collapsible dish(partially because it is fun to play with). It's really up to you and what you plan to store in it.


Ta-da!! You have officially made your very own recycled bowl. Because you decide the size and the shape, the possibilities are endless. One of mine ended up looking like a flower pot, so I have a feeling it will appear in future crafts... We'll have to see. Enjoy, and, as always, Happy Crafting!